Monday, September 17, 2012

Chocolate Peanut Butter Cupcakes

Yes... I absolutely cannot help myself...this is another chocolate peanut butter recipe. This time I had a great excuse...it was one of my Bridesmaid's birthday and this is also her favorite combination (yay, another excuse to use chocolate and peanut butter to the extreme!). I found a cake recipe I liked and modified it to cupcake form with a few twists here and there. I did use a box cake mix rather than go completely scratch this time...sometimes you just have to save the time. When I want to play with the toppings and fillings I usually use a box cake mix so I can put more energy into the garnish. These are so yummy I think everyone at the party had two!! Like I always say...absolutely cannot go wrong with this perfect combination.

Happy Baking!!


Chocolate Peanut Butter Cupcakes

1 box chocolate cake mix

Peanut Butter Cream Cheese Frosting
10oz cream cheese (room temperature)
1 stick unsalted butter (room temperature)
4 to 5 cups of powdered sugar (sifted)
1 cup creamy peanut butter

Chocolate Peanut Butter Ganache
8oz chopped semi sweet chocolate chips
3tbs creamy peanut butter
2tbs light corn syrup
1/2 cup heavy whipping cream

Peanut butter cups for garnish

1. Bake cupcakes according to instructions on box. Let completely cool

2. Using an electric mixer, beat the cream cheese and butter until light and fluffy


3. Gradually add powdered sugar 1 cup at a time. If you do not have a sifter (I need one too) you can use a strainer and shake it over the bowl.

4. Mix in the creamy peanut butter and whip until desired consistency. Place bowl in fridge while making the ganache. 


5. Chop chocolate chips into smaller pieces. This will help it to melt more evenly.

6. Place chocolate, corn syrup and peanut butter in a double boiler. If you do not have a double boiler (again neither do I) you can place a smaller sauce pan or bowl into a larger sauce pan filled with water. Make sure your heat is on LOW. Stir the mixture constantly until melted.

6. Take the chocolate mixture off the stove and add the whipping cream. Mix until smooth.

7. Using a spoon, spread the chocolate over the top of each cupcake.

7. Pipe or spread the peanut butter icing over the top. Finish by cutting up the peanut butter cups and crumble over the top of each cupcake.


Enjoy!


Saturday, July 21, 2012

Amaretto White Chocolate Raspberry Cupcakes

YUM! That is the first thing that comes to mind when I think of these cupcakes. I also like to call them the "I can't decide what kind of icing to use so I will use them all" Cupcakes. It was "Italian Week" at concert in the park last week and I didn't want to do yet another Tiramisu. I found a recipe for cupcakes that was influenced by an Italian Zuccotto Cake. Zuccotto is Italian for "little pumpkin". The Florentine Cakes are given their name because of their dome shape. The cupcake recipe called for Brandy, not something I usually keep on hand so I decided to use Amaretto instead. One change led to another and I ended up with these decedent treats. Kevin said I was "gilding the lily" with these, but I have to disagree they are perfect...but warning they are SWEET. They may not be the Italian dessert I was going for but sometimes when you go off plan you can end up with something better!


Amaretto White Chocolate Raspberry Cupcakes


Cupcakes:
1 Box of White Cake Mix (one with pudding in the mix is best)
1/3 Cup Vegetable Oil
3 Egg Whites
1 1/4 Cup Water
6oz chocolate chips chopped fine

Filling:
1 1/2 cup cold heavy whipping cream
Approx 3 tbs powdered sugar (to taste)
Fresh Raspberries (one per cupcake)
1 to 2 tbs Amaretto (to taste)

Ganache:
1/2 cup Heavy Whipping Cream
6oz Chocolate Chips

Icing:
6oz White Chocolate Chips
1 8oz package of Cream Cheese (room temp)
1/2 cup (1 stick) Unsalted Butter (room temp)
2 tsp Vanilla Extract

Cupcakes:

1. Pre heat oven to 350 degrees F. Line muffin or cupcake tin with cupcake papers

2. Chop chocolate that will go into cake batter


2. Combine cake mix, egg whites, oil and water in medium bowl. Mix well (until most of the lumps are gone but not completely).  Add and mix in the chopped chocolate.

3. Pour the batter into the prepared tin (about 2/3 full). I suggest using a measuring spoon and be sure to put the same amount into each tin. This is important so that the cupcakes bake evenly.

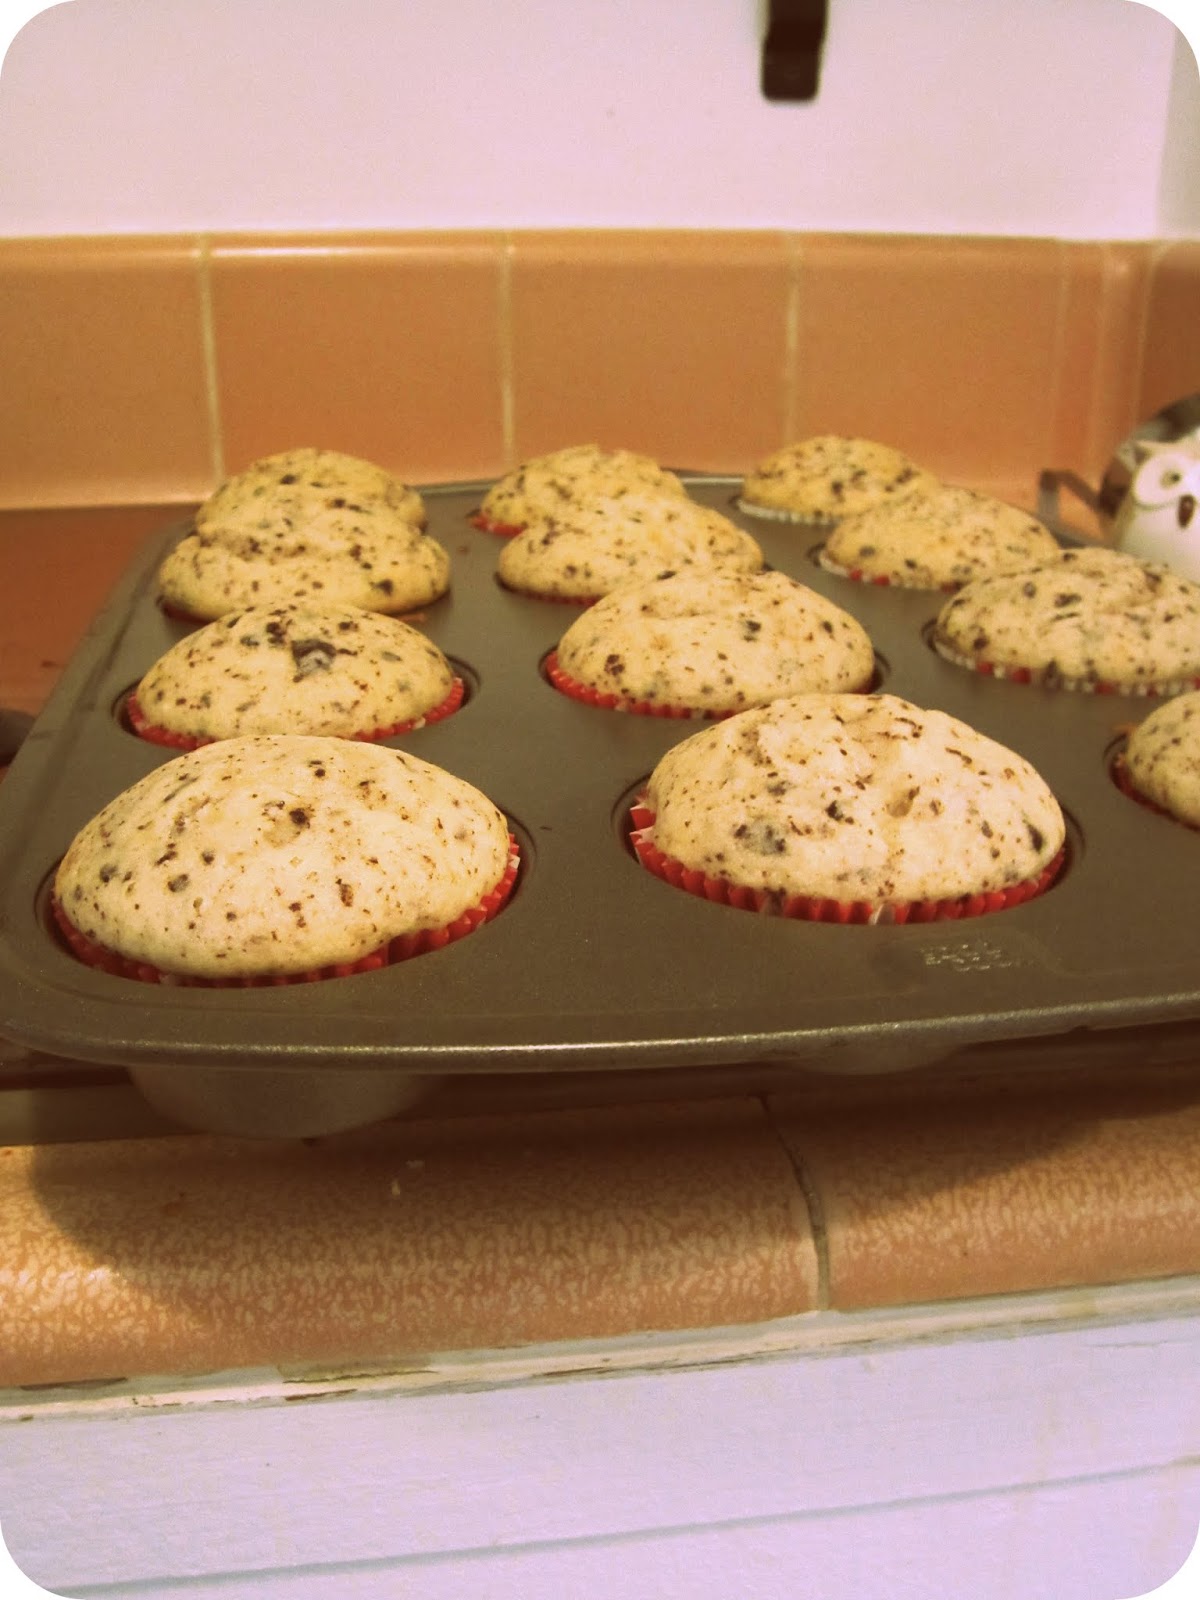
4. Bake for 15 to 20 minutes. Turn on the light in your oven...try to not peek at the cupcakes by opening the door...this can cause uneven baking. The cupcakes will spring back when pressed lightly on top when finished (you can also use a toothpick to check if they are done by poking down the center of the cupcake and if it comes out clean they are done).
Let cupcakes cool for 5 minutes in tin before placing on rack to completely cool.

Filling:

1. Beat the heavy whipping cream with an electric mixer (yes, I do most of my mixing by hand but this one requires a hand mixer...it just won't work otherwise). Beat until the cream gets peaks...until you have "whipped cream". Mix in the powdered sugar, taste and adjust for desired sweetness. Add in the amaretto.

2. Using a paring knife, cut the centers of the cupcakes out. You will and up with a cone shape piece. Save tops (cut off the filling and keep the top as a "cap".)

3. Spoon a small amount of the whipped filling into the center. Place a raspberry in the center. Top with a little more filling and then cover with the saved top. Refrigerate cupcakes while you make the ganache.


Ganache:

1. Place the chocolate chips in a heat safe bowl.

2. Place heavy cream in a sauce pan and heat to a boil.

3. Pour the hot cream over the chocolate chips and let sit for 5 minutes.

4. Whisk until smooth. Let cool until a spreadable consistency (so it won't melt off the top of the cupcakes). Approx 1 hour.

5. Spoon/ spread the cooled ganache on top of the cupcakes and place back in fridge.

Frosting:

1. Place white chocolate chips in a microwave safe bowl. Microwave for 30 seconds then stir. Microwave for another 30 to 45 seconds and stir until smooth. You must do this in 30 second increments or the chocolate will cease up. Set aside

2. Use electric mixer to blend the cream cheese and butter until smooth.

3. Mix in the white chocolate and vanilla extract. Blend until desired consistency.

4. Pipe the icing on or use a spoon to spread the icing on top of the cupcakes.


Garnish:

I placed a raspberry on top of each and then used a cheese grater to grate the chocolate shavings on top of each cupcake.


Yield: approx 18 cupcakes

Saturday, June 23, 2012

Crunchy AND Gooey Peanut Butter Cookies


Okay, so I think we have established that I have a peanut butter addiction (thanks Dad! I think all those "large spoonfuls of peanut butter as a snack" growing up did me in!). I came across this recipe many years ago and decided to try it again. The best part is it only takes 3 ingredients and I can almost guarantee you have them in your pantry right now! Also a bonus is this recipe works for my gluten sensitive friends too!  (this one is for you Rach!)


Peanut Butter Cookies (The "go to" recipe)


1 Cup Crunchy or Smooth Peanut Butter
1 Cup White Sugar
1 Egg


1. Pre-Heat Oven to 350 F


2. Mix all three ingredients in a medium bowl until completely combined. The mixture will be a thick dough


3. Use your hands to roll 1 1/2 inch balls of dough and place on cookie sheet.


4. Use a fork to press the dough down in the center. Create a criss cross pattern. Press lightly until the cookie is to the desired thickness (about 1/2 an inch). These cookies do not change shape much while baking.


5. Bake cookies for 10 minutes. (Hint: you will start to smell them as they finish).


Yield: Approx 18 cookies


You should have a cookie that is soft in the middle and slightly crumbly on the edges... the way I think a peanut butter cookie should be!


Some Variations for those who like chocolate with their peanut butter...


Add 1/2 cup mini chocolate chips to the dough before baking


Place an unwrapped chocolate kiss in the center of each cookie as soon as they are removed from the oven


Melt chocolate chips over VERY LOW heat then use a spoon to drizzle chocolate over the top of each cookie

Wednesday, June 6, 2012

Apple Cookies with Caramel Drizzle

I was at the market with my friend Krysia and she raved about some apple cookies she had at a restaurant recently. It got me to think... I'm not sure I've ever tried an apple cookie. So I picked up some dry apple rings and decided to play in the kitchen to see what I could come up with. First flavor that comes to mind when I think of apples and dessert is cinnamon (and I LOVE cinnamon). So naturally the next thought was snickerdoodles. I searched through a few snickerdoodle recipes and eventually came up with this recipe for my Apple Cookies. They are nice and soft in the center and the caramel sauce gives them that "little extra something". 


I am a big fan of fall flavors so these were nice a treat in June. I am definitely going to have to bring this one back in September!

Happy Baking!


Apple Cookies with Caramel Drizzle


1 cup Chopped Dried Apples
1 tbs and 1 tsp Brown Sugar
1/4 cup Apple Juice (or Water)
1/2 cup Butter Softened (1 stick)
3/4 cup White Sugar
1 Egg
1 tsp Vanilla Extract
1 - 1/3 cup All Purpose Flour
1 tsp Baking Soda
1/8 tsp Salt

Preheat oven to 375


1. Place the chopped dried apples, brown sugar and apple juice in a small saute pan and cook over medium heat. Stir regularly and cook until the apples have absorbed the liquid (about 5 minutes). Set aside


2. In a large bowl cream the butter and sugar together until smooth. Add the vanilla and butter and blend completely.

3. In a separate bowl mix together the flour, baking soda and salt.

4. Slowly add dry ingredients to the butter mixture and mix completely.

5. Mix in the cooked apples


6. Roll the dough into 1 to 2 inch balls and place on cookie sheet.


7. Bake for 9-12 minutes (always start with the lesser amount, you can always add more time). Bake until cookies have slightly puffed up in the middle, edges are starting to firm and are slightly golden.


8. Leave cookies on baking sheet for a few minutes before placing on cooling rack. (They will collapse slightly).


Caramel Drizzle


1 cup White Sugar
6 tbs Butter
1/2 cup Heavy Whipping Cream

1. Heat sugar over med-high heat. Stir with a wooden spoon until the sugar starts to melt. As soon as the sugar starts to boil stop stirring.

2. Cook until the butter has begun to turn to an amber color.

3. Add the butter and whisk. Once the butter has melted remove from heat. Count to three then add the cream. Be very careful the mixture will foam up at this point. Continue to whisk until smooth.

4. Let sauce sit to cool a bit before drizzling on the cookies.


Wednesday, May 30, 2012

Chocolate Peanut Butter Bites (No Bake!)

Sometimes it is just too hot to turn on the oven, so even a baker needs a few "no bake" recipes in her pocket. I made these with my father in mind. My whole life my dad and I have shared a mutual LOVE for peanut butter, add chocolate and there is NO resisting! And Oh My Goodness these are yummy! If you have a soft spot for peanut butter cups, you HAVE to make these...no excuses, they don't even require an oven.


Chocolate Peanut Butter Bites (No oven required)

2 1/4 Cups Creamy Peanut Butter (divided into 1 cup and 1 1/4 cup each)
3/4 Cup Butter (salted or unsalted) (1 1/2 sticks), Softened
2 Cups Powdered Sugar (divided into 1 cup each)
3 Cups Graham Cracker Crumbs (finely ground)
2 Cups Chocolate Chips (divided into 1 cup each)


1. Grease 13 x 9 baking pan with either butter, shortening or cooking spray


2. Beat 1 1/4 cups peanut butter and butter until creamy.


3. Slowly mix in 1 cup of powdered sugar. The mixture will begin to thicken. Once fully mixed, add remaining cup of powdered sugar, graham cracker crumbs and 1/2 cup of chocolate chips. The mixture will resemble cookie dough.


4. Press mixture into bottom of greased pan. Press down hard with spatula or hands until evenly pressed tightly into the pan.


5. Melt the remaining 1 1/2 cups of chocolate and 1 cup of peanut butter over LOW heat. (Seriously, use the LOWEST heat setting possible. Chocolate burns easily. If you are comfortable with a double boiler I would recommend melting the mixture this way.) Stir constantly.


6.  Pour and spread the chocolate over the peanut butter mixture. 

7. Place the pan in the refrigerator for at least an hour... 3 hours is best. Once firm, cut the bars into 1 inch cubes. 


8. Eat at least 4 pieces...okay this part is optional but I highly recommend it


Tuesday, May 22, 2012

Cranberry Orange Muffins

I've always said muffins are just cupcakes without the icing...but they are a GREAT excuse to eat dessert at breakfast time! For the last week I have been working on perfecting granola bars (more on those when I do actually figure it out) and I am a little granola-ed out so I decided to take a break and make a different breakfast treat, Cranberry Orange Muffins. I always have found it funny that people can like flavors of certain foods but not like that actual food. For example, I love orange flavored foods and desserts, but you will rarely ever see me actually eat an orange. We had these oranges on our counter for a while and instead of letting them only be decoration I decided to "eat" them.


I adapted this recipe from another blog (Glorious Treats). I found them to dry out a little quickly, so I would add 1/4 cup of sour cream to my next batch. I find that sour cream and/ or apple sauce to most of my breakfast bread recipes give it that little boost of moistness that allows them to keep for a few days. Happy Breakfast Baking!


Cranberry Orange Muffins


1 cup dried (sweetened) cranberries
1/3 cup fresh orange juice

2 cups all purpose flour
1 teaspoon baking powder
1/2 teaspoon baking soda
1/4 teaspoon salt

1/2 cup (1 stick) unsalted butter, at room temperature
1 Tablespoon fresh orange zest
2/3 cup sugar
2 eggs
1 teaspoon vanilla extract
1 teaspoon orange extract
2 Tablespoons oil (vegetable, canola or olive)
1/4 cup Sour Cream or Apple Sauce
1/2 cup milk (any fat content)


1) Pull out and measure your ingredients, or at least the butter, it must be at room temperature.


2) Pre-heat oven to 375 F. Line muffin or cupcake tin with papers. 


3) Zest  a whole orange (makes about 1 tablespoon). Cut and squeeze the juice out of the orange to make about 1/3 cup of juice. If you do not have enough juice from the orange go ahead and add some prepared orange juice to get the full 1/3 cup. 
You can use the small side of a standard grater if you don't have a zester.


4) Pour the orange juice and cranberries into a small sauce pan over medium heat. Bring to a low boil and simmer for 3-5 minutes. Set aside.


5) Mix dry ingredients in a medium bowl: flour, baking powder, baking soda, salt.
6) In another large bowl beat with a hand or stand mixer the butter, orange zest and sugar until fluffy.
7) Add the eggs one at a time, mixing well after each egg. Mix in vanilla extract, orange extract, oil and sour cream. 
8) Alternate mixing in the flour mixture and the milk (begin and end with flour).


9) Stir in cooked cranberries, careful not to over mix.


10) Pour batter into prepared muffin tins (about 3/4 full). 


Bake in heated oven for 18-20 minutes. Test by sticking a toothpick into the center to see if they are done (moist crumbs but not wet).


Yield: Roughly 12 standard Muffins.


Make them dessert....yum!

Mix powdered sugar with fresh squeezed orange juice to make a glaze (roughly 3 to 1 ratio). Keep adding powdered sugar a little at a time until the glaze is about the thickness of cinnamon roll glaze. Dip the tops of the muffins into the glaze and let dry.

Sunday, May 6, 2012

Caramel Swirls

Cake #1... Salted Caramel Cake with Caramel Buttercream (with caramel filling). This cake was both successful and not so successful. Per Kevin's request I first made Salted Caramel Cupcakes for Easter this year and they were AWESOME. I decided to use the same recipe but double it and make a cake for my cousin's birthday. 
 Visually the cake came out just like I wanted, the flavor was there, but the sponge was DENSE. I have a couple of theories as to why this happened... First, somewhere in the doubling process I may have "over-did" an ingredient (FOLLOW THE RECIPE WHEN BAKING).  This is possible, but I am really confident this was not it. More likely it was the water bath that I cooked the sponge in. A little trick I have learned with box mix cakes... cook the cake in a water bath and the cake will not rise in the middle making it easier to decorate and eliminate the trimming process to achieve a flat sponge. This is the first time I tried baking a scratch cake with the water bath...and it was DENSE, almost like a pound cake. Half of the party liked it and the other half was very polite :) I think I am going to have to use the same recipe and try it without the water bath (so hope you all are hungry and ready to eat more cake!).


I always like to try new things when decorating and this time around the fun part was the caramel swirls. So easy too! I boiled sugar and water (2 to 1) until it turned into a caramel (deep amber color). As soon as the caramel colors, the secret is to immediately dip the pan into a water bath to stop the cooking so you don't end up with burnt sugar. I then drizzled the caramel on a greased parchment sheet with a spoon. This time I just did circular drizzles but with more practice I think I could do shapes.


All in all, this recipe is a keeper... definitely as a cupcake and I am determined to convert it to a fluffy cake recipe too!


Tip of the post: Parchment Paper Base. I picked this up a few months ago... instead of just oiling your pan (butter, canola etc) use a parchment paper base. First you butter the pan, then cut a piece of parchment to place in the bottom of the pan. MUST BE PARCHMENT... Wax paper will burn! Another technique is to dust the buttered pan with flour, but when you are baking a chocolate cake, or doing any sort of naked cake you will be stuck with flour residue on your sponge that will be visible. The parchment makes for EASY removal from the pan. Keep the parchment on the cake while it cools...it keeps the moisture in the cake before you decorate or moisten the sponge simple syrup if you so choose.